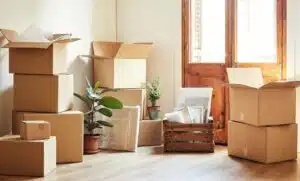
The moving truck has pulled away, the last box is gone, and a sea of empty rooms echoes back at you. For a moment, there’s relief. But then, the final, most daunting task of any move looms large: the move-out clean. It’s more than a simple tidy-up; it’s a deep, detailed cleaning that can determine whether you get your full security deposit back. For renters in Ontario, this final step is a crucial financial transaction, and for homeowners, it’s a critical part of a smooth handover to the new owners.
The sheer scale of the job can feel overwhelming. Where do you even begin? What specific details do landlords inspect? How can you possibly get it all done efficiently amidst the chaos of relocating? checkout our Additional Moving service .
You can breathe a sigh of relief. As moving specialists at Top Town Movers, we’ve managed countless relocations in North York and across the GTA. We understand that a successful move isn’t just about getting your belongings safely from A to B—it’s about closing your previous chapter on a positive and financially sound note. That’s why we’ve created this guide.
Your Essential Plan for a Fast, Easy, and Thorough Clean-Out
Before you even touch a sponge, a successful clean requires a strategy. Walking into the job unprepared will lead to wasted time and missed spots. By adopting a professional mindset and gathering the right supplies, you can work smarter, not harder.
The Golden Rule: Always Clean an Empty Property
The most common mistake people make is trying to clean around boxes or leftover items. It’s impossible to be thorough. The absolute best time to perform your move-out clean is the day after your professional movers, like the team at Top Town Movers, have cleared the entire premises. An empty space gives you complete access to every floor, corner, and surface that needs attention.
The Professional Method: Top-to-Bottom, Back-to-Front
There’s a system to cleaning efficiently. Follow this professional-grade methodology:
- Top-to-Bottom: Always begin at the highest point in a room and work your way down. Dust ceiling corners and light fixtures first. Then, clean windows and walls. Next, wipe down countertops and surfaces. Finally, vacuum or mop the floors. This ensures that any dust and debris you dislodge fall onto uncleaned areas, preventing you from having to re-clean surfaces.
- Back-to-Front: Start your cleaning in the rooms and areas furthest from the main entrance (e.g., an upstairs primary bedroom). Work your way systematically towards the front door. This strategic path prevents you from tracking dirt across your freshly cleaned floors. The very last floor you mop should be the one that leads you out the door for the final time.

Gathering Your Cleaning Arsenal: An Essential Supply List
Don’t get caught running to the store mid-clean. Prepare your toolkit in advance.
Cleaning Agents:
- All-Purpose Cleaner
- Heavy-Duty Degreaser (non-negotiable for the kitchen)
- Glass Cleaner
- Abrasive Cleaner (e.g., Comet, Vim, or a baking soda paste)
- Specialty Oven Cleaner
- Toilet Bowl Cleaner & Disinfectant
- Stainless Steel Cleaner
- Floor Cleaner specific to the surface types (hardwood, laminate, tile)
- Magic Erasers (for wall scuffs)
Tools & Equipment:
- A large stack of clean microfiber cloths
- A variety of sponges (non-scratch and heavy-duty)
- A high-quality vacuum cleaner with all attachments (crevice tool, brush, extension wand)
- Mop and bucket
- Squeegee (for streak-free windows and shower doors)
- Sturdy step stool
- Extendable duster
- Detail brushes (grout brush, old toothbrushes)
- Heavy-duty trash bags
- Protective rubber gloves and eyewear
Simplify Your Move with This Easy Room-by-Room Cleaning Plan
Here it is: The landlord-approved checklist for getting your money back. This detailed, room-by-room guide breaks down the entire property into manageable zones. Tackle one area at a time, check off the items as you go, and watch your former home transform.
A. All Rooms (Bedrooms, Living Room, Dining Room, Hallways)
This general checklist forms the foundation for every living space and hallway.
- Ceilings, Walls & Fixtures:
- Use an extendable duster to remove all cobwebs from ceiling corners and edges.
- Dust ceiling fan blades (both top and bottom).
- Remove and wash all light fixture covers, and dust the bulbs.
- Spot clean walls and wipe away any scuffs, smudges, or fingerprints.
- Thoroughly wipe down all baseboards. This is a detail inspectors always check.
- Clean all light switches, outlet covers, and thermostats.
- Windows & Doors:
- Clean the interior of all windows and glass doors until they are sparkling and streak-free.
- Vacuum out window tracks and wipe them clean.
- Wipe down all window sills and ledges.
- Wipe down both sides of all doors and clean doorknobs and frames.
- Closets:
- Ensure closets are completely empty.
- Wipe down all shelves, rods, and walls inside the closet.
- Vacuum or mop the closet floor.
- Floors:
- Carpeted Floors: Vacuum the entire area thoroughly. Use the crevice tool to get deep into the edges along the baseboards. For any stains or high-traffic areas, consider renting a carpet cleaner for a deep clean.
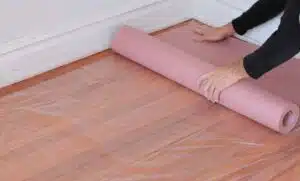
- Hard Floors (Wood, Tile, Laminate): Sweep or vacuum first to remove all debris, then mop with a cleaning solution appropriate for the specific material.
- Learn More >>>>How to Pack for a Move

Don’t Lose Your Deposit: The Ultimate Checklist for a Spotless Finish
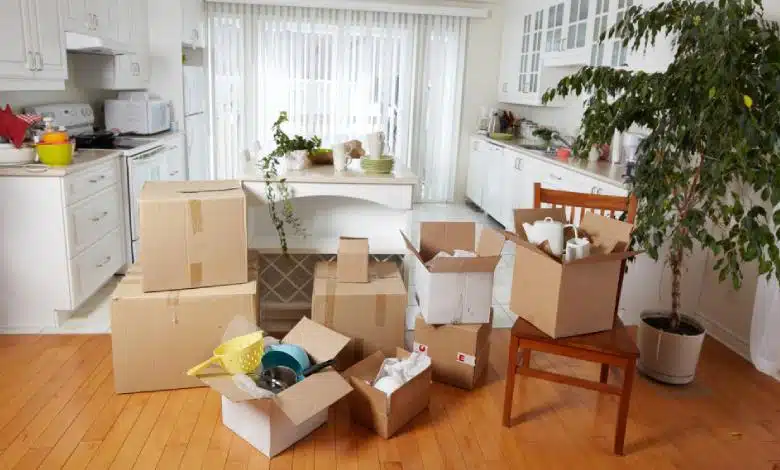
The next two areas—the kitchen and bathrooms—are where the battle for your security deposit is truly won or lost. These rooms require the most time and attention to detail.
B. The Kitchen: The Epicenter of the Deep Clean
A greasy kitchen is a red flag for any landlord. This part of your rental clean-out checklist is the most intensive.
- Appliances (Inside and Out):
- Oven/Stovetop: Remove all oven racks and the drawer below. Soak them in hot, soapy water. Use a powerful oven cleaner on the interior, following the product’s directions carefully. Scrub the interior and the inside of the door. Remove gas grates or electric coil drip pans and scrub them with a degreaser. Clean the entire stovetop surface.
- Refrigerator/Freezer: Remove every shelf, drawer, and compartment. Wash them thoroughly and dry them before replacing. Wipe down the entire interior of the fridge and freezer. Pull the unit away from the wall to vacuum coils and clean the floor underneath and the wall behind it. Wipe down the exterior, including the top, sides, and handles.
- Dishwasher: Clean the interior, paying close attention to the door seals. Remove and clean the filter at the bottom of the unit (a commonly missed, grimy spot). Wipe down the exterior front panel.
- Microwave: Clean the interior, making sure to scrub the ceiling and walls of any splatters. Wash the turntable plate. Clean the exterior.
- Range Hood: Degrease and clean the entire unit. Remove the filter and soak it in a degreasing solution before scrubbing it clean.
- Cabinets, Drawers, and Surfaces:
- Wipe out the inside of every single cabinet and drawer to remove crumbs and dust. Remove any old shelf liners.
- Wipe down the exterior of all cabinets and handles, removing built-up grease and fingerprints.
- Scrub and disinfect all countertops.
- Scour, sanitize, and polish the sink and faucet until they shine.
C. The Bathrooms: Detail and Disinfection are Key
The goal in the bathroom is to make every surface look and feel sanitized. This is a critical part of any end of tenancy cleaning checklist.
- Shower & Tub:
- Scrub the tub, shower basin, and shower walls with an abrasive cleaner to remove all soap scum and hard water residue.
- Use a grout brush to scrub grout lines until they are clean.
- Clean shower door glass until it’s crystal clear and streak-free. Don’t forget to clean the door tracks.
- Clean and polish all faucets and the showerhead.
- Toilet:
- Clean and disinfect the entire toilet from top to bottom. This includes the inside of the bowl, under the rim, the seat (and its hinges), the tank, and the entire base down to the floor. Clean the hard-to-reach area behind the toilet.
- Vanity, Sink & Mirror:
- Scrub and disinfect the sink and faucet.
- Wipe down the vanity countertop.
- Clean the mirror so it is free of all streaks and smudges.
- Empty and wipe down the inside of the medicine cabinet and any other drawers or cabinets.
- Floors & Fixtures:
- Dust the ventilation fan cover.
- Wipe down towel racks and toilet paper holders.
- Sweep and thoroughly mop the floor, paying close attention to the area around the toilet base.
- Learn More >>>>10 Tips for Moving With Kids Without a Hitch
The Final Walk-Through: Your Last Chance to Impress
Before you hand over the keys, perform one last critical step: your own inspection. Think like a landlord and scrutinize every detail. This is the last phase of your final cleaning checklist.
- Document Everything: This is your insurance policy. Walk through the entire, cleaned property and take detailed, well-lit photos and videos of every room. Open cupboards, the oven, and the fridge to show their condition. This timestamped evidence is your best defense against any potential disputes over your security deposit.
- A Fresh Nose Knows: Do a final “smell check.” Lingering odors from pets, smoking, or cooking can create a bad impression. Open windows to air out the property for a few hours before you leave.
- Check the Details: Look high and low. Did you wipe the top of the door frames? Clean the filter in the dishwasher? Check inside the window tracks? A final pass to catch these small items can make a big difference.
- The Final Sweep: Give the entryway floor one last sweep or vacuum on your way out the door.
- Keys and Lock-Up: Gather every single key, remote, and access card. Follow your end of lease cleaning list or rental agreement instructions for where to leave them. Lock the door behind you, and you’re officially done.
Conclusion: A Clean Slate for a New Beginning
Moving is a complex process, and the final clean-out is a demanding but necessary conclusion. It’s your last responsibility to your former home and a crucial step in ensuring a smooth, financially successful transition. By leveraging this move out cleaning checklist, you transform an overwhelming chore into a manageable project, setting yourself up for a full security deposit return and a positive end to your lease.
While this guide empowers you to handle the final clean with confidence, remember that the most physically demanding part of your move—the packing and transport—is best left to professionals. For a seamless and stress-free relocation in North York or anywhere across Ontario, trust the experts at Top Town Movers. We handle your belongings with the utmost care, allowing you to focus on the important details of your journey, like preparing for a new beginning with a clean slate.
Contact Top Town Movers today for your free moving quote and let us help you make your next move your best move.