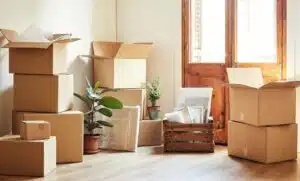
Moving fragile and often irreplaceable items like mirrors, framed artwork, and large pictures is a significant concern for anyone relocating. These items are highly susceptible to damage during transit if not packed correctly. While standard moving boxes offer general protection, their flat, often oversized nature demands a specialized solution. That’s where the Four Piece Mirror & Picture Box comes in. This ingenious system is designed to provide custom, robust protection for your most delicate and visually impactful wall decor.
At Top Town Movers, serving clients across Ontario and specifically the North York area, we routinely use and recommend these specialized boxes because we understand their critical role in preventing damage. This comprehensive guide will walk you through, step-by-step, exactly how to assemble the Four Piece Mirror & Picture Box properly, ensuring your cherished items arrive at your new home in pristine condition.
- Learn More >>>>Packing / Unpacking
- Learn More >>>>500+ Things Gone | How To Declutter Like You Are Moving
Why the Four Piece Mirror & Picture Box is Essential
Before diving into assembly, it’s crucial to understand why this specific type of box is superior for mirrors and artwork:
- Customizable Fit: Unlike a fixed-size box, the four-piece design allows you to adjust the box’s length and width, creating a snug, custom fit for items of various dimensions. This minimizes internal shifting, which is a primary cause of damage.
- Layered Protection: When assembled correctly, the overlapping pieces provide multiple layers of corrugated cardboard around the item, significantly increasing impact resistance.
- Edge and Corner Reinforcement: The design naturally reinforces the vulnerable edges and corners of mirrors and frames, which are often the first points of impact in a fall or bump.
- Professional Standard: This is the industry standard for safely moving flat, fragile items, preferred by professional movers like Top Town Movers for its reliability.
Attempting to pack a large mirror or piece of art in a standard box, or simply wrapping it in blankets, is a common mistake that often leads to costly breakage. Investing in and correctly learning how to assemble the Four Piece Mirror & Picture Box is an investment in the safety of your valuables.
Anatomy of the Four Piece Mirror & Picture Box
A standard Four Piece Mirror & Picture Box set typically consists of:
- Two “U” Shaped End Pieces: These pieces cap the short sides of your mirror/picture. They usually have inner and outer flaps.
- Two “L” Shaped Side Pieces: These pieces form the long sides of your mirror/picture, extending the length of the box. They also typically have tabs or overlapping sections.
All pieces are made from sturdy, often double-walled, corrugated cardboard. They are designed to slide and interlock, allowing for adjustable dimensions.

- Learn More >>>>The BEST House Moving Tips (and Mistakes to Avoid)!
Essential Materials Needed
Before you assemble the Four Piece Mirror & Picture Box, ensure you have these additional materials:
- Packing Tape: High-quality, wide (2-3 inch) packing tape. You’ll need a good amount to secure the overlapping seams.
- Packing Paper/Bubble Wrap: For initial wrapping of the mirror/picture itself.
- Foam Corner Protectors (Highly Recommended): These provide excellent shock absorption for the most vulnerable parts.
- Moving Blankets/Quilted Pads: For an extra layer of cushioning around the item before boxing.
- Gloves: To prevent fingerprints on the glass and for a better grip.
- Marker: For clear labeling.
- Assistance: For larger mirrors/pictures, enlist a helper for safe lifting and handling.
Step-by-Step Guide: How to Assemble the Four Piece Mirror & Picture Box
Follow these detailed steps to ensure your mirror or picture is packed with maximum protection.
Phase 1: Preparing the Mirror/Picture Itself
This initial wrapping is critical before placing the item into the box.
- Clean and Inspect: Gently clean the mirror/glass surface. Inspect the frame for any loose pieces or existing damage.
- Tape the Glass (Optional but Recommended for Large Mirrors/Glass Art): For very large mirrors or fragile glass, apply painter’s tape or masking tape in a star (*) pattern or crisscross (X) pattern across the glass. If the glass breaks, this tape will help hold the pieces together, preventing shards and further damage. Do not use duct tape or strong adhesive tape directly on the glass or frame, as it can leave residue or damage finishes.
- Apply Foam Corner Protectors: Fit a foam corner protector snugly onto each of the four corners of the mirror/picture. These are designed to absorb impact.
- Wrap with Bubble Wrap: Wrap the entire mirror or picture with at least two layers of large-bubble bubble wrap. Ensure the bubbles face inwards towards the item for maximum cushioning. Secure the bubble wrap with packing tape, but avoid taping directly to the mirror/frame surface.
- Add a Moving Blanket (Optional but Recommended for Extra Protection): For added cushioning, especially for valuable or very large items, wrap the bubble-wrapped item in a soft moving blanket or quilted furniture pad. Secure the blanket with packing tape or shrink wrap.
- Learn More >>>>Tips to Make Moving Less Stressful
Phase 2: Assembling the Box Pieces
Now, let’s learn how to assemble the Four Piece Mirror & Picture Box around your prepared item.
- Lay Out Your Workspace: Clear a large, flat, and clean area on the floor.
- Prepare the Item: Place your wrapped mirror or picture in the center of your workspace. It’s best to keep it upright, leaning slightly against a wall or supported by another person for larger items.
- Position the End Pieces (U-Shaped):
- Take one of the “U” shaped end pieces. Identify the inner and outer flaps.
- Slide this piece over one of the short ends of your wrapped mirror/picture. The “U” shape should cradle the top, bottom, and side edges.
- Push it firmly until it’s snug against the item, but without deforming the cardboard.
- Repeat this step for the other short end of the mirror/picture with the second “U” shaped piece.
- Position the Side Pieces (L-Shaped):
- Take one of the “L” shaped side pieces.
- Slide this piece over one of the long sides of your wrapped mirror/picture. The “L” shape should cover the long edge and extend towards the middle of the item.
- Push it firmly until it’s snug against the item.
- Repeat this step for the other long side of the mirror/picture with the second “L” shaped piece.
Phase 3: Telescoping and Taping for a Secure Fit
This is where you achieve the custom fit and create a robust, layered box.
- Telescope the Pieces (Adjusting for Size):
- The “U” shaped end pieces and “L” shaped side pieces are designed to overlap and slide into each other.
- Adjust Length: Gently push or pull the “L” shaped side pieces until they meet and overlap in the middle of the mirror/picture. The amount of overlap will depend on the length of your item. Ensure the overlap is even and substantial (at least 6-12 inches for good strength).
- Adjust Width: Similarly, ensure the “U” shaped end pieces are properly encompassing the width of your item and overlapping snugly with the “L” pieces.
- Tape the Seams (Crucial for Strength):
- Start with the Long Overlap: Once you have the correct length, use your strong packing tape to thoroughly seal the long seam where the two “L” shaped pieces overlap. Apply multiple strips of tape, wrapping them around the box’s circumference for maximum strength. Don’t just tape along the seam; extend the tape around the edges.
- Seal the Ends: Next, tape the seams where the “U” shaped end pieces meet the “L” shaped side pieces. Again, use multiple strips of tape, wrapping them fully around the box to create a secure, encapsulated unit.
- Reinforce All Seams: Go over every seam, corner, and edge where cardboard pieces meet or overlap. The goal is to create a completely sealed, rigid, and secure box. Imagine the box needs to withstand bumps and pressure from all angles.
- Tape the “U” Piece Flaps: Ensure any inner or outer flaps on the “U” pieces are firmly taped down to the rest of the box.
- Test the Box: Once fully taped, gently try to wiggle the mirror/picture inside the box. It should feel snug and secure, with minimal to no movement. If there’s movement, add more padding inside (crumpled packing paper or bubble wrap) and re-tape.

- Learn More >>>>How to Pack for a Move
Final Touches: Labeling and Handling
You’ve successfully learned how to assemble the Four Piece Mirror & Picture Box! Now, for the critical final steps:
- Label Clearly: This is paramount for fragile items.
- Write “FRAGILE – MIRROR/PICTURE” in large, bold letters on all sides of the box.
- Draw prominent “THIS SIDE UP” arrows on all sides, indicating the correct orientation for transport. This is vital to ensure it’s not laid flat.
- Add the destination room (e.g., “Living Room,” “Master Bedroom”).
- Consider writing a brief description of the contents (e.g., “Family Portrait,” “Antique Mirror”).
- Always Transport Upright: Reiterate this to anyone helping you move. Mirrors and pictures should always be transported standing on their edge, never laid flat. Laying them flat, especially large ones, can cause the glass to crack under its own weight or the weight of items on top of them during transit.
- Secure in the Truck: When loading into the moving truck, place the boxed mirror/picture against a sturdy, flat surface (like a mattress or the truck wall) and secure it firmly with moving straps. Pad around it with moving blankets to prevent shifting or impact from other items.
Why Top Town Movers Prefers This Method
At Top Town Movers in North York, we specialize in making your move within Ontario as smooth and damage-free as possible. The Four Piece Mirror & Picture Box is an indispensable tool in our arsenal because:
- Proven Protection: It offers superior protection compared to makeshift packing methods, drastically reducing the risk of damage claims.
- Efficiency: While the assembly takes a few minutes, it saves immense time and stress compared to dealing with broken items later. Our crews are trained to assemble these quickly and effectively.
- Professional Standard: Using these boxes reflects our commitment to professionalism and the careful handling of your valuable possessions.
- Client Confidence: Our clients have peace of mind knowing their most cherished and fragile items are packed to the highest standard.
- Learn More >>>>moving services greater toronto area
Learning how to assemble the Four Piece Mirror & Picture Box might seem like an extra step, but it’s a small investment of time and effort that pays off immensely by protecting your valuable and sentimental items. Whether you’re hiring professionals or tackling a DIY move, mastering this technique will give you confidence that your mirrors and artwork will arrive safely at your new Ontario home.