Moving an upright piano is a task that looms large in the minds of anyone relocating. Unlike a regular piece of furniture, a piano is a complex, heavy, and often top-heavy instrument, with delicate internal mechanisms and a polished exterior susceptible to damage. While the allure of saving money might tempt you to move a piano yourself DIY, it’s crucial to understand the immense risks involved, even “with the right equipment and skill.”
At Top Town Movers, serving Ontario and specifically the North York area, we handle countless moves every year, and upright pianos are among the most challenging items. Our experience has taught us that while certain small, simple moves might be feasible for a highly prepared and skilled individual, the vast majority of upright piano relocations absolutely demand professional expertise. This comprehensive guide will dissect the realities of attempting to move a piano yourself DIY, outline the equipment and precautions necessary for minimal risk (where feasible), and,
- Learn More >>>>Moving a 600 pounds Steinway Piano Upstairs
The Realities of Moving an Upright Piano: When to DIY (and When to Call Top Town Movers)
The True Weight of the Matter: Why Upright Pianos Are So Dangerous to Move DIY
Let’s address the fundamental challenge: the weight. Upright pianos are deceivingly heavy, often far exceeding what people anticipate.
- Spinet Pianos: 300-400 lbs (smallest uprights)
- Console Pianos: 350-500 lbs
- Studio Pianos: 400-600 lbs
- Full Upright/Professional Upright Pianos: 500-900 lbs (or even more for very old models)
Beyond sheer weight, other factors compound the difficulty:
- Top-Heavy Design: The cast-iron frame, which holds the immense tension of the strings, is located in the upper half of the piano. This makes uprights inherently unstable and prone to tipping forward or backward if not handled with extreme care.
- Awkward Dimensions: Tall, deep, and relatively narrow, pianos are difficult to grip, maneuver around corners, and navigate through doorways.
- Delicate Internals: The internal action (hammers, dampers, keys) and the soundboard are highly sensitive to jarring, impacts, or being dropped. Even a seemingly minor jolt can lead to costly repairs or permanent damage to the instrument’s sound and playability.
- Vulnerable Exterior: The polished wood finish is easily scratched, chipped, or dented.
- Learn More >>>>Piano Moving
The Risks of a DIY Upright Piano Move (Even “With the Right Equipment and Skill”)
Even if you meticulously follow every step and acquire equipment, attempting to move a piano yourself DIY carries significant inherent risks:
- Severe Personal Injury: This is the paramount concern. Back injuries (herniated discs are common), crushed fingers or toes, sprains, strains, and even broken bones can result from a dropped or tipping piano. This can lead to long-term pain, disability, and medical expenses far exceeding the cost of professional movers.
- Catastrophic Piano Damage: A dropped piano is almost certainly destroyed. Even lesser impacts can result in cracked soundboards, broken strings, damaged keys, or internal mechanisms being thrown out of alignment, leading to thousands of dollars in repairs or rendering the piano unplayable.
- Extensive Property Damage: Pianos can easily gouge hardwood floors, rip carpets, chip tiles, dent walls, scrape door frames, or even compromise stair railings. Repairing such damage can be expensive and time-consuming.
- Lack of Insurance Coverage: Your homeowner’s insurance might not cover damage to the piano or your property if you attempt a DIY move, especially if negligence (like improper equipment use) is a factor. Professional movers carry specialized transit insurance.
Conclusion: For the vast majority of scenarios, attempting to move a piano yourself DIY is simply not advisable. The cost of a professional piano mover pales in comparison to the potential medical bills, piano repair/replacement costs, and property damage expenses.
- Learn More >>>>piano moving New Market
When Might a DIY Upright Piano Move Be (Theoretically) Considered?
It must be stressed that these are extremely limited circumstances, and even then, significant risk remains. This is NOT a recommendation, but an acknowledgement of hypothetical scenarios where someone might attempt it:
- Smallest Spinet Piano: At the absolute lowest end of the weight spectrum (300-350 lbs).
- Short Distance: Moving it within the same room, or from one adjacent room to another, with NO stairs, NO thresholds, and a completely level, clear path.
- Perfect Floor Surface: Hardwood or tile, perfectly flat, with no rugs or obstacles.
- Exceptional Physical Condition and Strength (of multiple people): Not just one person, but a minimum of two, ideally three or four strong, coordinated, and healthy individuals.
- Access to ALL Professional-Grade Equipment: This isn’t just a furniture dolly.
Even in these ideal (and rare) circumstances, the risks are still high.
- Learn More >>>>how to move a piano across the room
The “Right Equipment and Skill” for a DIY Attempt (If You Insist)
If, against strong recommendations, you must attempt to move a piano yourself DIY, here is the absolute minimum equipment and “skill” (preparation/technique) required. This is for informational purposes only and does not constitute an endorsement of DIY piano moving.
Essential Equipment:
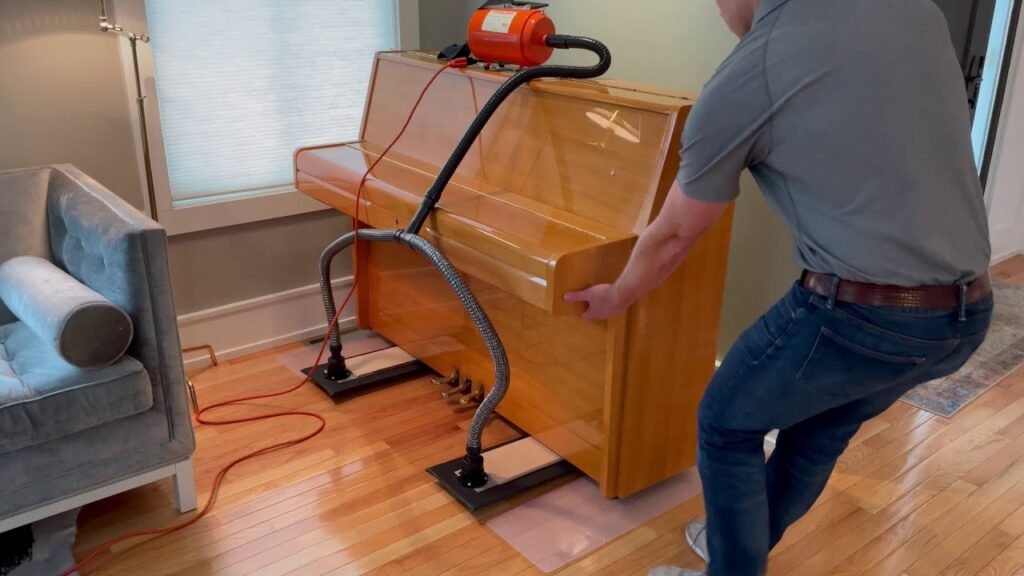
- Heavy-Duty Piano Dolly (or Skid Board & Dolly System): This is non-negotiable. A standard furniture dolly is insufficient and dangerous. A piano dolly is a low-profile, wide, incredibly sturdy platform with multiple non-marking, robust wheels.
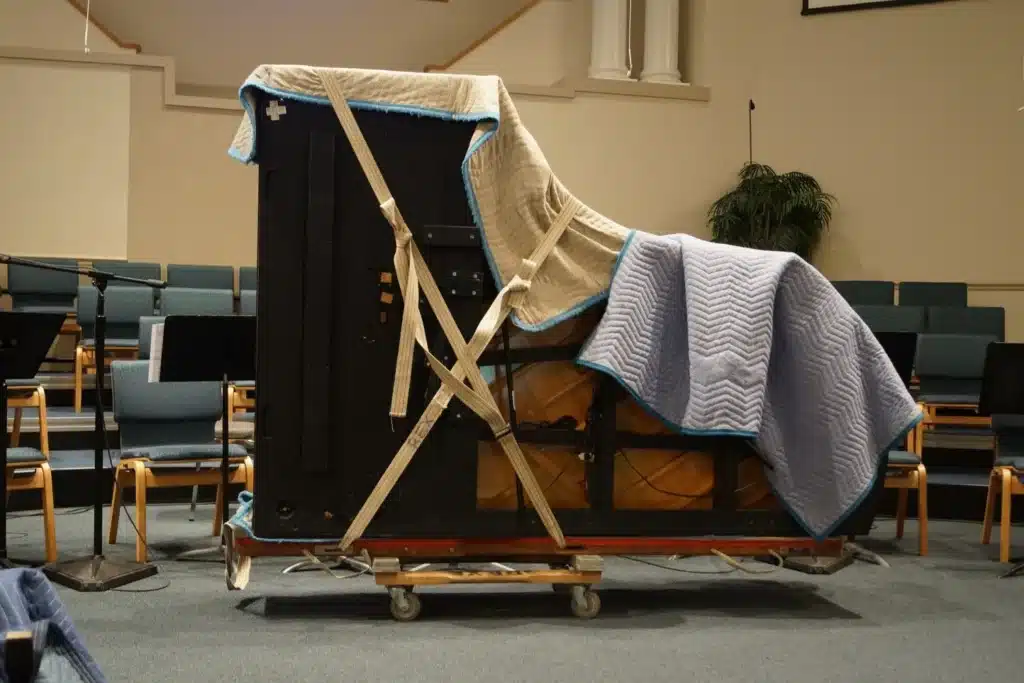
- Multiple Heavy-Duty Moving Blankets/Quilted Pads: At least 6-8 professional-grade blankets.
- Heavy-Duty Straps (Ratchet Straps): To secure the piano to the dolly and later, to the truck walls.
- Piano Moving Straps/Harnesses (Shoulder Dollies): These allow movers to use their legs and core strength, distributing weight more effectively than just lifting with arms. Crucial for stairs or any significant lifting.
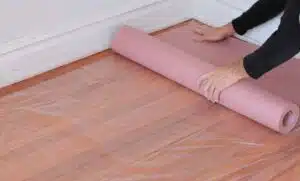
- Thick Cardboard or Plywood Sheets: For protecting floors, especially hardwood or carpet, along the entire path.
- Painter’s Tape (Not Duct Tape): For securing padding or the keyboard lid without damaging the finish.
- Screwdriver/Wrench: To remove the pedal lyre (on some uprights) or caster wheels if necessary.
The “Skill” (Preparatory Steps & Technique – Requires Multiple People):
A. Preparation is Paramount:
- Clear the Path: Remove every single obstacle from the piano’s path – rugs, furniture, wall decor, picture frames, doorstops. Measure all doorways and hallways to ensure the piano will fit.
- Protect the Path: Lay down thick moving blankets, plywood, or heavy-duty floor runners along the entire route, especially over thresholds, carpets, or delicate flooring.
- Protect the Piano:
- Close and Lock Keyboard: Gently close the keyboard lid. If it doesn’t lock, secure it shut with painter’s tape or a small strap (applied over padding if possible).
- Protect Pedals (if applicable): Some uprights have a removable pedal lyre. If so, remove it and wrap it separately. Otherwise, ensure it’s well-padded.
- Wrap Thoroughly: Meticulously wrap the entire piano in at least 2-3 layers of heavy-duty moving blankets. Pay special attention to corners, edges, and the top. Secure the blankets tightly with shrink wrap or packing tape (applied to the blankets only, never the piano finish).
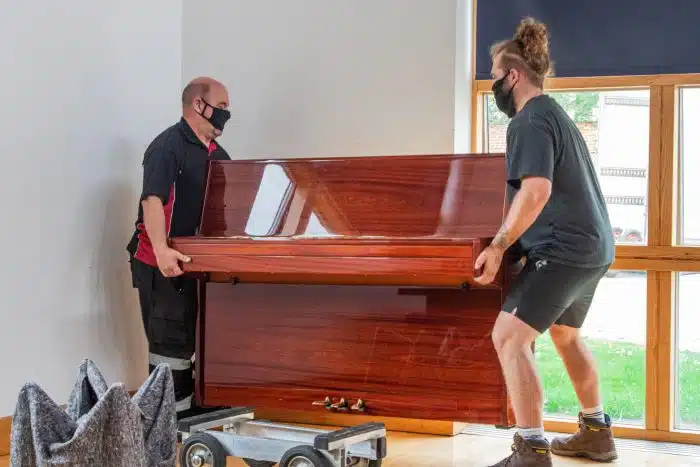
- Assemble Your Team: A minimum of TWO strong, healthy adults. Ideally THREE or FOUR for a 500 pound piano. Everyone must be briefed on the plan, communicate constantly, and understand their role. Designate a leader for commands.
B. The Move – Level Surface (Still Requires Extreme Caution):
- Tilt and Dolly:
- With your team, gently tilt the piano back and forth a few inches.
- Have one person slide the piano dolly under the heaviest side (usually the back where the iron harp is).
- Carefully lower the piano onto the dolly. Ensure it is centered and balanced.
- Crucially: The piano must be secured to the dolly with ratchet straps. Do not skip this.
- Rolling:
- Push the piano slowly and steadily. Never rush.
- One person should guide the front, one at the back, and others on the sides for stability and balance.
- Navigate corners by having one person gently push from the side while others steer.
- Through Doorways:
- Most uprights are too deep to go straight through a standard door.
- You’ll need to pivot it. Gently tilt the piano onto one side (the side with the casters still on the ground, or the side of the dolly) and carefully turn it through the doorway. This requires extreme care to prevent tipping. Door frames must be padded.
C. The Move – Stairs (Highest Risk – Strongest Recommendation to AVOID DIY):
Moving an upright piano up or down stairs is where DIY becomes exceptionally dangerous. Even with “skill” and “equipment,” it’s beyond the safe capabilities of non-professionals. If you face stairs, CALL TOP TOWN MOVERS. For completeness, here’s an overview of the professional (extremely risky for DIY) method:
- Secure to Skid Board (NOT a Dolly): For stairs, the piano must be strapped to a specialized piano skid board, which acts like a sled. The piano is laid on its strongest, flat side (often the back), heavily padded, and secured to this board.
- Piano Straps/Harnesses: Movers wear specialized harnesses, with straps looped under the skid board, allowing them to use their legs.
- Team Positioning: For downhill (moving down stairs), the heaviest person is typically at the bottom, controlling the descent and taking the brunt of the weight, using their leg strength to brace. Others support from the top and sides, guiding and balancing. For uphill, the strongest person leads from the top, pulling, while others push and balance from below.
- Controlled Descent/Ascent: One step at a time, slow, deliberate movements. Constant communication is vital: “Hold,” “Pivot,” “Down one,” “Up one.” No jerking motions.
- Spotting: An additional person often “spots” to watch for hazards, clear the path, and give warnings.
- Learn More >>>>piano movers near me
Why Professional Movers Are the Only Safe Option for Pianos
For any piano move beyond a short, level roll within the same room, calling Top Town Movers is the only truly safe and responsible choice.
- Trained Experts: Our movers are specifically trained in piano handling techniques, weight distribution, and leverage. They understand the nuances of different piano types and challenging environments (like stairs).
- Specialized, Insured Equipment: We possess heavy-duty piano dollies, skid boards, multi-person piano harnesses, ramps, and comprehensive padding materials designed specifically for piano transport. This equipment is regularly maintained and insured.
- Teamwork and Coordination: Our crews work as a cohesive unit, communicating constantly and executing precise maneuvers that are impossible for inexperienced individuals.
- Insurance Coverage: Top Town Movers carries liability and cargo insurance that protects your valuable piano during transit, providing peace of mind that a DIY move simply cannot offer.
- Property Protection: We use professional-grade floor runners, wall pads, and door frame protectors to safeguard your home against damage.
- Efficiency: While not done in minutes, our professional approach is the fastest safe way to move a piano, saving you immense time, stress, and potential costs.
- Learn More >>>>piano moving in GTA
Don’t let the daunting task of moving an upright piano tempt you into a dangerous DIY attempt. The risks to your health, your home, and your precious instrument are simply too high. For reliable, safe, and professional piano moving services in North York and across Ontario, trust Top Town Movers. We have the expertise, the equipment, and the commitment to ensure your piano arrives at its new destination perfectly in tune with your expectations.